Showing posts with label Crafts. Show all posts

Wednesday, November 5, 2014

Easy DIY Christmas Packaging Ideas


I love pretty little packages. I mean, what girl doesn't like a gift wrapped in cute paper and tied up with twine, ribbon and other little embellishments like buttons, stamps and doilies? As you can see from previous blog posts and my Facebook page, I've already been busy making some kits for my Etsy shop and market :-)!

With Christmas just around the corner (7 weeks and counting...), I thought it would be fun to have a post on some easy DIY ("do it yourself") packaging ideas you can use to dress up your Christmas or Advent gifts.

1. Use fabric instead of ribbon 


Using a cotton fabric, make a cut on the selvedge edge of a piece of fabric (the long side that is "bound" along the edges) about one inch from the edge, or however wide you want your ribbon to be. Tear the fabric from the cut all the way down to the bottom and pull off the extra threads.  Do both sides if you want it to look "shabby chic". Alternatively, use shearing scissors (the ones that have the zig-zag teeth on them) to cut the fabric piece to the size you want. Use in place of ribbon to tie around a box, envelope or package.

Here's an idea for packaging using a wide fabric ribbon
(this will be the packaging for my Child Apron & Baking Kits :-)!).

2. Decorative paper envelopes for gift cards


Use a template (you can find loads on Pinterest) or a Stampin' Up! Envelope Punch Board to make adorable little envelopes for gift cards. Decorate the outside with stamps, ribbon, doilies and top with a tag and small wooden clip. Here are some I made with the SU! punch board for my Etsy shop and Christmas market.

3. Brown Bag It
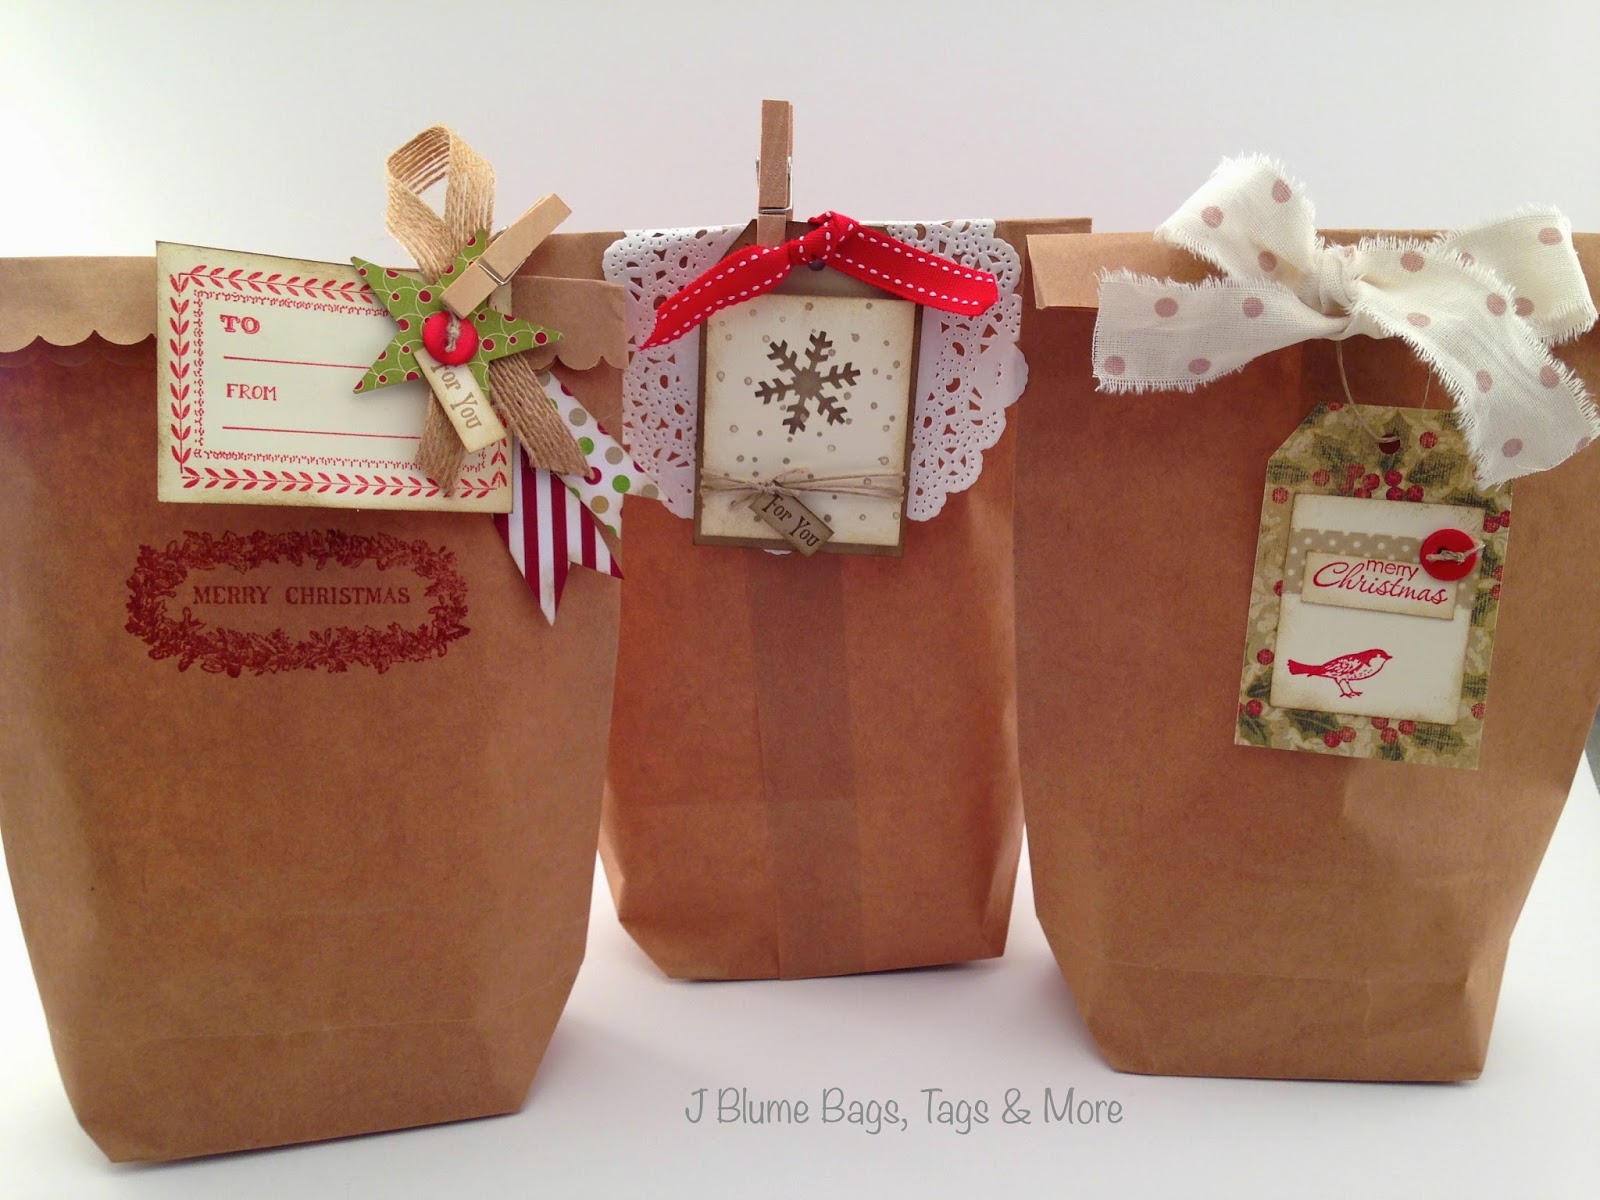

I love all the brown paper gift bags that I see popping up on Pinterest all the time. Who knew those brown paper lunch bags could be so cute!! You can stamp on them, print sayings or images on them (check out this tutorial I found on Pinterest), make the top edge scalloped using a punch, and then top them with whatever you have on hand, such as, scrap papers cut into flag bunting, punched Christmas trees or hearts, doilies, lace, tags and the list goes on and on...!!  Here are examples from three different kits I made for Christmas. Each kit includes all supplies to make 5 gift bags (one design per kit). As you can see on the bag on the right, I made my own fabric ribbon to tie the bag closed.

4. Scrap fabric & paper gift tags

Cut out tags using kraft-colored paper (I normally cut my tags to be 2 inches wide by 3 inches high, but you can cut them in any size you like). I have this tag punch from Stampin' Up! that works great for creating the tops of the tags. Then you can decide if you want to use scrap fabric or maybe you have a lot of scrap decorative paper from other projects...or use BOTH! Glue or sew onto the tags in a random way, add some text of your choice (either using stamps or printing off your computer) and voilĂ , you have a unique gift tag! Here are a couple cute ideas I found on Pinterest.

Adorable vintage flair paper and fabric tag from Love Stitching Red Blog
Check out these amazing Chrismtas tree scrappy tags from tracyBdesigns on Etsy


Pinterest is overflowing with ideas. Check out my "Packaging Ideas" board for loads of DIY packaging inspiration.

I hope this post has inspired you to get creative for the upcoming holiday season!

J x


Monday, January 20, 2014

"Be my Valentine" - 10 Fun Valentine's Day Ideas


Given that Valentine's day normally falls right in the middle of my kids' winter ski break, I tend to forget about all the fun I had as a kid making Valentine's for my family and friends. Some people think that Valentine's day is just a commercial holiday meant to make money...which, I must admit, I also believe is true! Why do we need one day a year to tell people we love them when we can do it every day of the year?? However, this being the case, it doesn't necessarily mean you have to go out for an expensive fancy dinner or spend lots of money to give something special to someone you love. Why not have a party with your kids and some of their friends, or even your girlfriends, and make something fun and/or delicious? Send a handmade Valentine to those special people in your life who may not hear "I love you" or "You are awesome" or "Thanks for being my ...(friend, mom, dad...)" as often as you would like. Pick up the phone and call someone you haven't had time to speak to recently. Make cookies with your kids and share with your neighbors. The possibilities are endless! And, if you choose to make something, the handmade touch will make it all the more special!

I've rounded up 10 fun ideas from various websites that will help you in your quest for the perfect Valentine's day gift:

1. Make cute little burlap gift bags to fill with treats. All I can say is...adorable!
(from The Casual Craftlete)
 DIY Valentine's Day Burlap Gift Bags #burlap #Valentines #giftbags #DIY #treatbags

2. Make these cute Valentine cards with clothespins. How simple would this be??!
(from Simply Kierste)
clothespin valentine | simplykierste.com

3. Make pretty "stained-glass" hearts to hang in your window.
(from Just Between Friends)


4. Print out this free printable and give to your kids and their friends. I couldn't resist the birds...!
(from Pretty Providence)


5. Round up your kids (or girlfriends) and have a Valentine's party (wine included for the girlfriends :-)!)
(from Brit Co)
Make-Your-Own Valentine Station.

6. Make treat bags for your friends, neighbors, teachers, kids and anyone else you can think of!
(from Black Eiffel)
Martha Stewart Kid's Valentines

7. Make DIY felt heart handwarmers - a great gift for a cold winters day!
(from Henry Happened)
Felt Heart Hand Warmers

8. Bake heart shaped sugar cookies and let your kids decorate them. Share with your neighbors!
(Royal Marigold has links to the recipes in the pic below)
lil heart sugar cookies

9. Make heart cupcake toppers and serve on your favorite cupcakes (homemade or store-bought).
Image below was taken from Pinterest - it is so darn cute! You could also just punch or cut out hearts, add some glitter or little buttons and glue them to a toothpick. Et voilĂ !
Super cute! Stuffed book page heart with bunting.

10. Make Valentine's day party poppers - you could also fill with small candies or toys instead of the photo banner!
(from Flax & Twine)
Make these Valentine's Day Photo Party Poppers with Martha Stewart Crafts Punches! Get the DIY Instructions from Flax & Twine! #marthastewartcrafts #12monthsofmartha

Enjoy your week and don't forget to give someone special a big hug!
J xx

Monday, September 2, 2013

Custom order baking kit

Hi there!

I just wanted to share with you a custom order I finally completed this week. It is a baking kit for an 11 year old girl who also loves horses. My dear friend, Barb, gave me permission to use a print of one of her incredible horse paintings and I love how well it goes with the colors I chose for the box. I hope the new owner of the box finds it as lovely as I do!


Enjoy your week!
J xx

Wednesday, May 29, 2013

The joy of boxes!

I love boxes! You can use them for so many different things - decorating a room, storage for special treasures (and those things that are not so attractive...), organizing all that stuff that we continually must have... you name it, you can put it in a box!

For my upcoming Summer craft market, I made some fun gift boxes that I would like to share with you.

The first set of boxes are Scrap Fabric Paper Doll kits (of course, I found this idea on Pinterest...! Thanks to "This Mama Makes Stuff" blog and her post found here). I decoupaged the outside of the boxes and added some adorable little pom-pom trim to give them that extra something special. Inside, I made instructions for use and included:
- 4 templates of paper dolls
- bag of scrap fabric, buttons, ribbons, flowers and any other little bit that I found laying around my desk
- glue sticks
- scissors (2 so the child can do this with a friend)
- example paper doll made by my kids


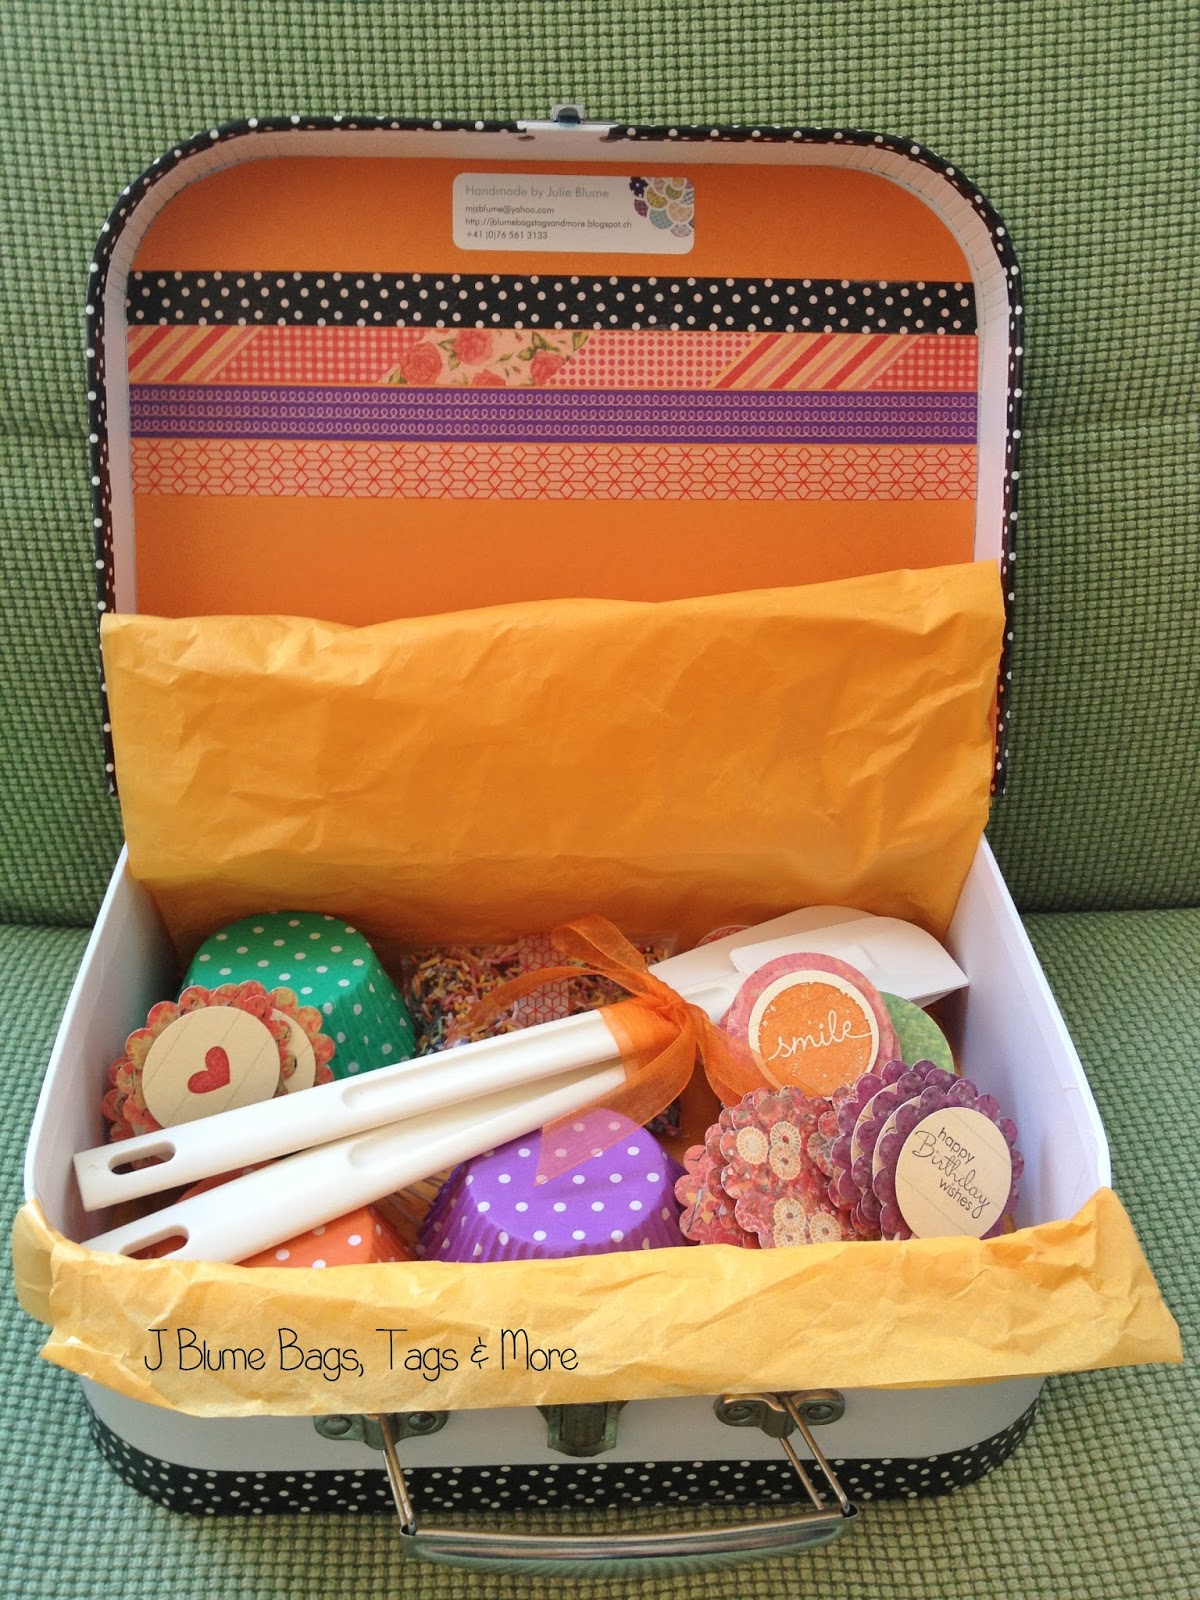
The boxes above came in a set of two, one large and one small. I used the smaller size for the doll kits and now have the large ones that I can play around with. As many of my friends and family know, I love to bake and make those baked goods pretty, so I have all kinds of cupcake paper liners and sprinkles. What do the above make when one adds a pretty decoupaged box, some flower cupcake toppers and a flag bunting that can go onto a cake?? Why a BAKING KIT in a pretty box, of course!


Hope you like them!
J xx

Friday, May 17, 2013

Ribbon Bookmarks

Hi there strangers! Long time, no see... Spring is always a busy time for us, with Spring break for two weeks (back in the US with family - yeah!!) and what seems like 100 local holidays where the kids are out of school. I remember loving May in Zurich when I was working and had no children...now it is more like "...Really?!?!?! Another day off of school?????"


Being the Pinterest fanatic that I am, I came across a very cute and VERY EASY post for paper clip bookmarks with ribbons tied to the top (here's the post if you are interested). Holy cow, was it ever correct in saying it was easy!!! Here's what I made for my upcoming market...and I made about 35-40 of them in under 1 hour!!!  When I was at my Mom's for Spring break, I found one of my favorite books, "The Secret Garden", and just have to use it in my display. What do you think?


Have a wonderful weekend!
J xx

Tuesday, March 26, 2013

Fabric Easter cards

It is hard to believe that Easter is almost here and there is SNOW ON THE GROUND!!!! I mean, what is up with that????? I was hoping not to see more snow until next winter, but I guess God has other plans for us! In order to keep my spirits up and start getting into the Spring mode, I've been busy sewing this week!


I'm making some reversible tote bags that will be fun for summer outings, and with some of the scraps for one of the bags, I made these adorable little Easter cards using a template I found on Pinterest (my favorite place to escape to!). The template I used is from the NanaCompany blog so pop over to her blog to check out all the other cute stuff she makes! I used Heat-n-Bond adhesive and traced the images from the template onto the paper side after ironing it to the fabric. Then I ironed the fabric to cardstock and stitched around using the sewing machine. Of course, I had to add some little tags and rough up the edges of the cardstock to make them a bit cuter! I love how they turned out!


I'll be back soon with some pictures of the totes and other bags that I am making. In the meantime, have a HAPPY EASTER filled with all of God's wonderful blessings!

J xx

Friday, March 22, 2013

Stationary Box Class Photos

Ten crafty ladies and I had a great time last week creating stationary boxes and a variety of cards and tags to go in the boxes! It was quite a project to tackle in a few hours (note...lesson to self for future classes!), but everyone did well and completed most of the items in the time we had. A big thanks to Dennise for letting us use her studio. You can find more photos on her blog Chick Kiss. Here are some of my pictures of the event!


Have a great weekend! Spring weather is here in Zurich (at least for the weekend...)!!!!
J xx

Thursday, March 7, 2013

Stationary Box Class ... a sneak peak!

Spring is starting to show its face in Zurich after a long winter and many mornings of shoveling the driveway - Hooray!!! But...as is normally the case when the weather is beautiful, I've been cooped up in my office, working hard to prepare for our Stationary Box class that will take place on Tuesday and Friday next week (see this post). Below is a sneak peak of what we will be making.

This is my example box set. There are several tutorials for this box on the internet. I used the pdf from this tutorial that I found on Pinterest, so special thanks to Dannie's Designs for the pdf version!!


Our combined classes will have 10 lovely, crafty ladies, and as such, I've made packs for them to choose from, each containing a different set of colors and patterned paper. I did this for two reasons: 1) it allows each person to create their own unique box set, and 2) it helps clear out a small portion of my 12x12 designer paper so I can purchase more on my next trip to the USA in April! The basic box will be in kraft paper because it goes with everything (and is one of my favorite stock to have on hand). 


Hope you are having a great week!

J xx


Sunday, March 3, 2013

30 Days of Lists

How many of you have to write lists to keep track of all the things floating around in your head that needs to be done? I have lists going all over the house: for groceries, my wish list of what I want to get done for the week, list of projects I want to complete, etc, etc, etc...  Given my infatuation interest in Pinterest, I couldn't help but pin something that caught my eye called "30 days of Lists". It is fun little project where you compile a list based on a daily prompt, such as "I am a lister because..." or "This ______, I am going to:_____". It allows me to get a bit creative in addition to writing lists of interesting stuff. I can finally use all the fun little notebooks, stickers, scraps of favorite papers, and washi tape (of course!) that I have sitting around my office!
30 Days of Lists by J Blume

I had hoped to be ahead of the game and have my little notebook all ready to go and start listing on Day 1, but....I turned 40 (YIKES!) on Thursday and had too many other things to do over the past couple of days (understandably)! I started the cover of the notebook as you can see above and will be posting more pictures of my lists as I manage to get through them!

If you are interested joining this little project, you can register HERE. There is a small fee involved but this gives you access to their private blog, lots of free downloads, examples of what others are doing on the project via a Flickr group and other fun information and give-a-ways.

Happy listing!
J xx

Thursday, January 31, 2013

Stamp Camp in January

I held a Stamp Camp at my house a couple weeks ago for one of my friends and wanted to share what we made with you. I enjoy spreading the love of stamping and what you can do with paper to others and find it such a shame that Switzerland does not have more products like Stampin' Up...! There is a HUGE market for this type of crafty goodness in Switzerland and I think SU! would do very well if they would make the decision to come into the country (they already have operations in Germany, France and the UK... so why not Switzerland????).

One thing that I introduced to the class was the use of a Sizzix embossing machine that one of my friends loaned me. OH MY GOODNESS...I LOVE THAT MACHINE!!! It takes a plain old piece of paper and turns it into something beautiful with only the turn of a crank! The Smile card below, as well as the birdy note pad use the embossing plates for the background and I just love the look it gives to them. Guess what I am getting for my birthday in a few weeks....!

We made 4 cards and a little notebook
Birdy notebook with embossed cover

This is my favorite card that we made. Can you see the birds that are embossed on the brown background? 

They all had fun creating their own balloon card using a variety of papers from my scrap box. 

The old maps are actually a set of paper placemats I found one time. They are perfect for more "manly" cards. 

 Below are a few photos of the class participants.
Let the creativity flow!

The crafty participants, including a brave, young man (and the first male particpant to attend one of my classes!)
Happy stamping!
J xx